Step by Step to create a roller banner
Todays task was given to us by Maxine. The brief was “to create the design work for 2 Roller Banners that will be used for exhibitions to represent Connectability.me (the organisation) & CPOD (The magazine)”
Step 1 – Figure out the size of the working area.
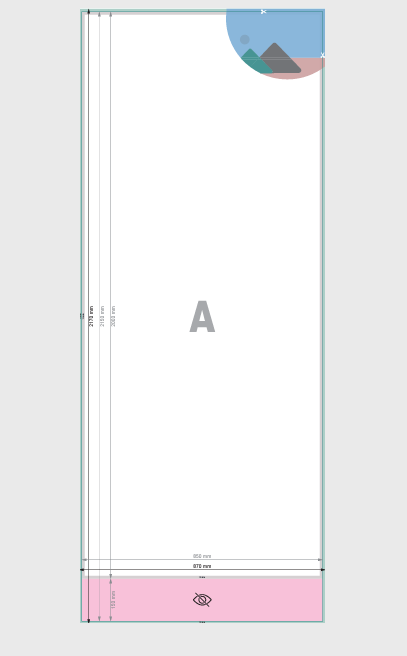
We use a company called https://www.onlineprinters.co.uk/ and they provided this template below. The template specifications are 85cms x 200cms the cost is approximately £40 + VAT
Step 2 – Find Inspiration to create.
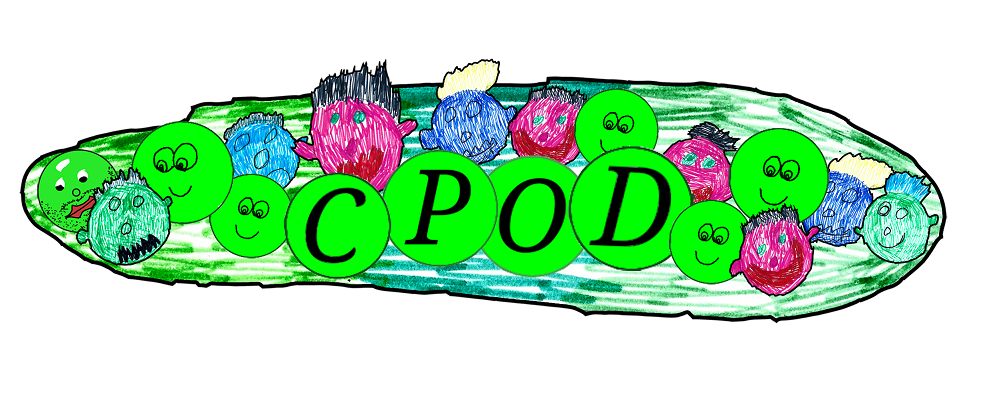
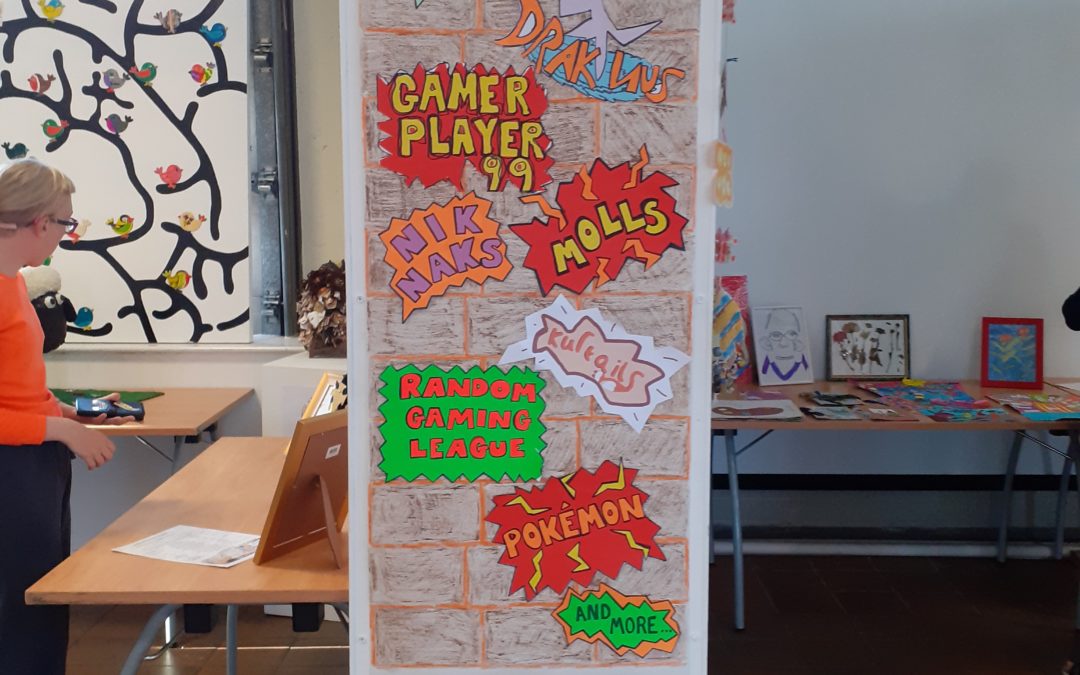
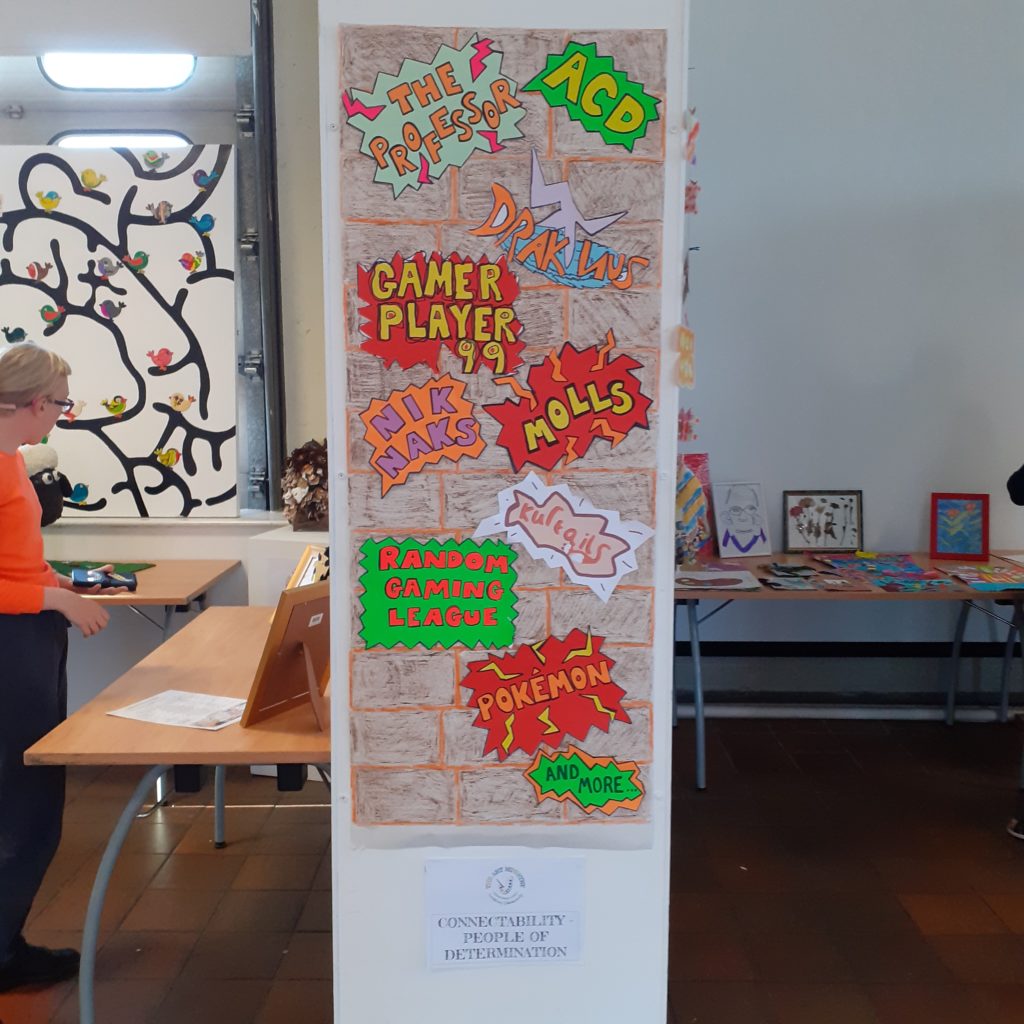
Our resident artist NikNaks had recently created this awesome Fake Wall for an exhibition and everything that was pinned onto this display was created by CPOD
Step 3 – Brainstorm Ideas
The key to any kind of design project is a spider graph. This is a great way to get all of our ideas onto page and then we can select the best ideas and put them in order on a page.
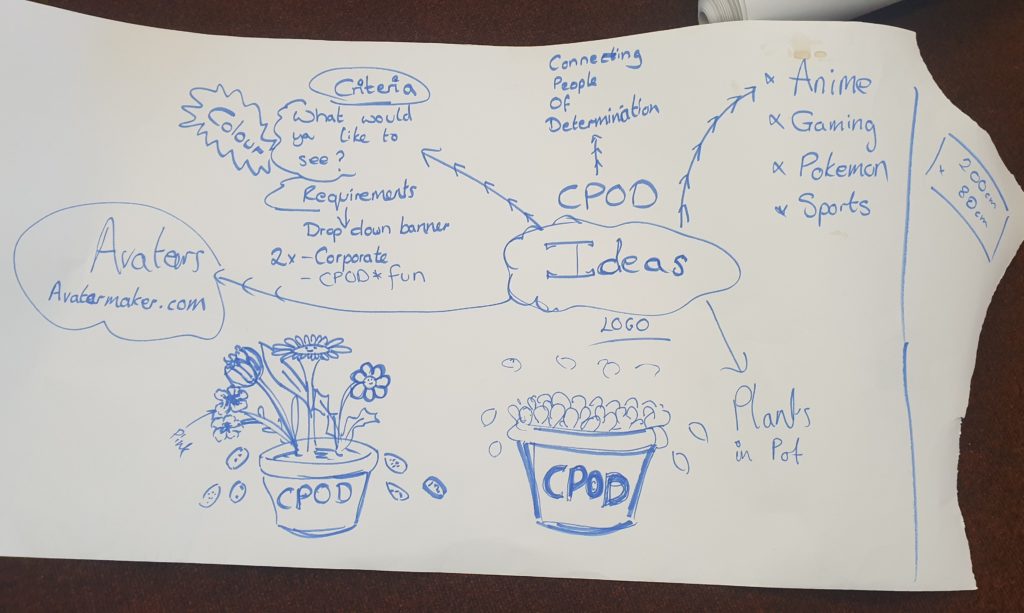
Here is our Spider Graph.
Step 4 – Mock Up Design
In order to create a masterpiece we have to create a mock up or draft design that we can agree on. Before we send to the digital scanners and artists to create the template.
Step 5 – Create the original design pieces
We have decided to use A4 art books in order to create each piece of the banner. (because the scanner we have is A4 in size) This way we can issue each contributor A4 pages that they can do some design work at home. We can easily piece together in our final design.
to be continued…
Recent Comments